
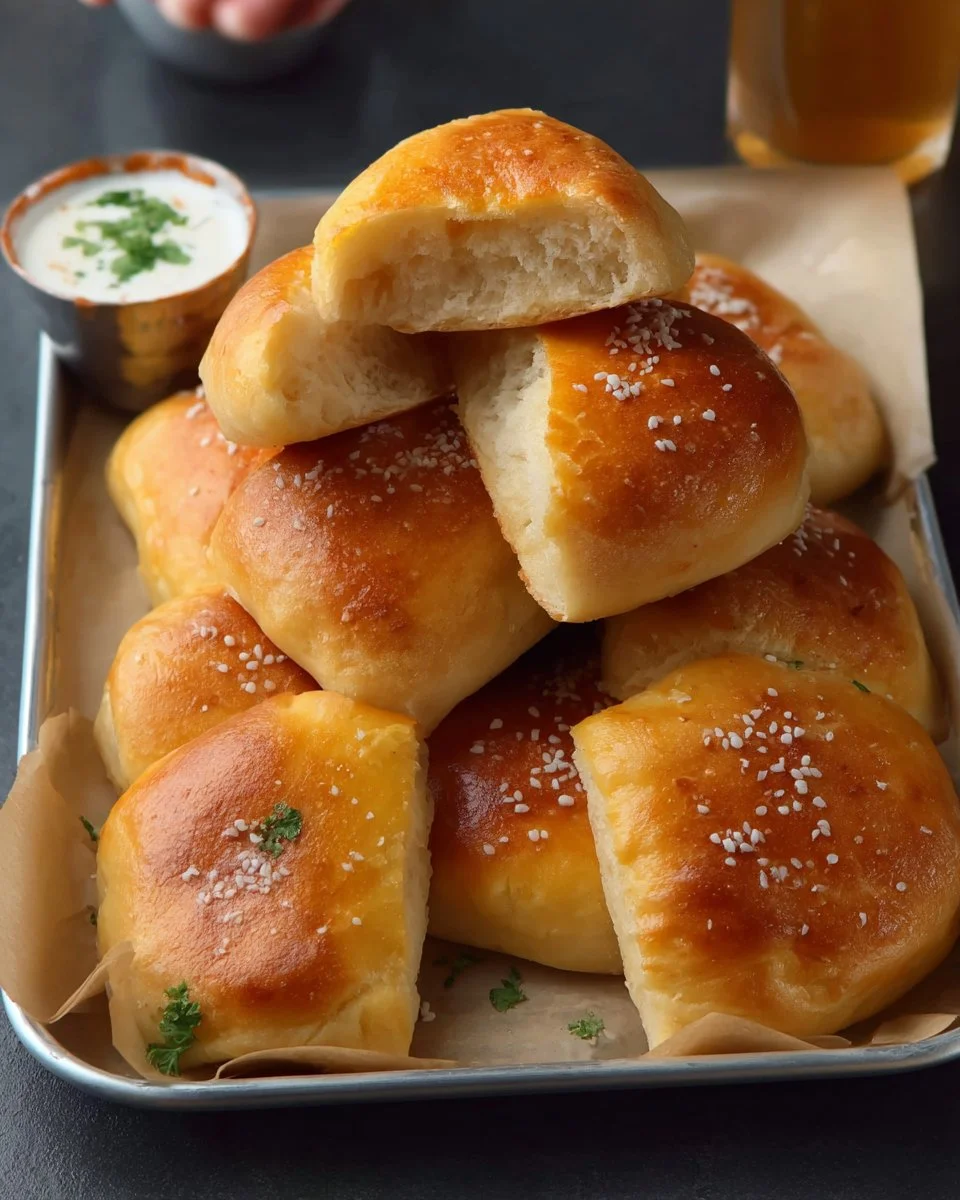
There’s something truly special about biting into a Soft Fried Bun. They’re like little clouds of joy that melt in your mouth, golden on the outside and pillowy soft on the inside. Imagine the aroma wafting through your kitchen as they sizzle, and the way they beckon you with their light, fluffy texture. These buns have become a staple in my kitchen, especially when I’m entertaining loved ones or simply craving a cozy treat to share with family during a casual weekend gathering.
These Soft Fried Buns come together surprisingly fast, making them perfect for both special occasions and busy weeknights when you want to whip up something delightful without spending hours in the kitchen. You can enjoy them as a standalone snack, or fill them with your favorite stuffings—sweet or savory, the possibilities are endless! And let’s be honest, they barely last until the next day, but if they do, they store beautifully for a treat later on.
WHY I LOVE SOFT FRIED BUNS
Soft Fried Buns hit that sweet spot of being incredibly easy and undeniably delicious. There’s just something about the warm, doughy goodness that makes them a true winner at my table, whether paired with a comforting soup, served as a simple side, or enjoyed as an indulgent snack. The flavor profile is mild yet comforting, and their versatility means you can customize them in so many delightful ways.
SOFT FRIED BUNS INGREDIENTS
The magic of these Soft Fried Buns truly lies in the harmony of their simple ingredients. Don’t worry about exact measurements just yet; those are all in the recipe card for you!
CORE INGREDIENTS AND THEIR ROLES
- 150 ML MILK (LUKEWARM): This creamy base helps create a tender bun and adds a subtle sweetness.
- 70 ML WATER (LUKEWARM): Balances the milk and ensures the dough comes together smoothly.
- 7 G INSTANT YEAST: These little powerhouses help our buns rise beautifully, making them airy and light.
- 12 G HONEY: Adds a touch of natural sweetness and promotes browning during frying.
- 400 G ALL-PURPOSE FLOUR: This is the backbone of our dough, providing structure and a lovely chewy texture.
- 7 G SALT: Enhances the overall flavor and balances the sweetness of the honey.
- 30 G UNSALTED BUTTER (ROOM TEMPERATURE): This luxuriously rich ingredient gives the buns that soft, melt-in-your-mouth quality.
SUBSTITUTIONS AND TIPS
Need a swap? Here are a few options to give your Soft Fried Buns a new twist:
- Milk: You can use almond milk or soy milk for a dairy-free version, though it won’t be quite as rich.
- Honey: Substitute with agave syrup or maple syrup for a different sweetness profile.
- Flour: Whole wheat flour can be used for a nuttier flavor; just expect a denser texture.
- Want some fun filling options? Try adding a dollop of jam, or for a savory twist, fill them with spiced potatoes or cheese.
KITCHEN TOOLS YOU’LL NEED
- Mixing bowl
- Measuring cups and spoons
- Wooden spoon or spatula
- Clean kitchen towel or plastic wrap
- Deep frying pan or heavy-bottomed pot
- Thermometer (for oil temperature)
- Slotted spoon or spider to remove buns
HOW TO MAKE SOFT FRIED BUNS
Let’s dive into creating these irresistibly soft Soft Fried Buns. I’ve broken down the process into simple steps, so follow along, and you’ll have a delicious treat in no time. We’re aiming for tender, golden buns that will make everyone coming back for seconds!
Foam the Yeast Mixture
First, stir the instant yeast into the lukewarm milk, lukewarm water, and honey. Let it rest until it becomes foamy—this step is key to ensuring our buns rise properly!
Combine Dry Ingredients
Next, in a large mixing bowl, add the all-purpose flour and salt. This will be the foundation of our dough, providing both structure and flavor.
Knead the Dough to Perfection
Now, add the foamy yeast mixture and the unsalted butter to the dry ingredients. Knead the dough until it’s smooth and elastic, about 8-10 minutes. You’ll know it’s ready when it springs back lightly when poked!
Allow the Dough to Rise
Once you’ve kneaded, cover the bowl with a clean kitchen towel or plastic wrap and let it rise in a warm place until doubled in size, about 1 to 1.5 hours. This is the moment where patience pays off; a good rise makes for beautifully fluffy buns.
Shape the Dough into Balls
After rising, punch the dough lightly to release any air and divide it into 10 equal pieces. Shape each piece into a ball (feel free to fill them with your chosen filling if you’d like).
Let Them Puff Up
Next, cover the shaped dough balls with the towel again and let them rest for another 30-40 minutes until puffy. You’ll see them grow, which gets me every time—it’s like watching magic happen!
Heat the Oil to Fry
While the dough rests, heat oil in a deep frying pan to 175°C (350°F). Make sure the oil is hot enough to create that crispy outer layer without being overly greasy.
Fry the Buns to Golden Perfection
Now, fry the buns in small batches to avoid overcrowding. Cook until golden brown on all sides, about 2-3 minutes for each batch. This is where the aroma fills your kitchen, promising a treat that’s just around the corner!
Drain and Serve
Finally, use a slotted spoon to drain the buns on a paper towel. You can serve them plain, dust them with sugar for a sweet treat, or fill them with your favorites for an even more decadent experience.
HOW TO STORE SOFT FRIED BUNS
These buns are best enjoyed fresh, but if you happen to have leftovers (which is rare!), you can store them at room temperature for about a day. For longer storage, keep them in an airtight container in the refrigerator for up to 3-4 days. If you’ve got a stash in the freezer, they last for about 2-3 months. To enjoy, simply thaw at room temperature or reheat gently in the oven or microwave.
TIPS FOR SUCCESS
- Use high-quality ingredients; it truly makes a difference in flavor.
- Allow enough time for both rises—don’t rush; this will enhance the texture significantly.
- Ensure the oil is at the right temperature; too low, and you’ll end up with greasy buns.
- Be gentle when shaping the dough; you want to retain as much air as possible!
SERVING SUGGESTIONS
- Serve with a side of spicy dipping sauce for a savory experience.
- Pair with a light salad for a refreshing contrast.
- Enjoy with a cup of hot tea or coffee for a perfect afternoon snack.
- For fillings, think about sweetened cream cheese or fruit preserves for a breakfast treat!
- Dust with powdered sugar for a lovely presentation—simple yet elegant!


Leave a Comment